
How to Paint Kitchen Cabinets for a Professional Finish (Step-by-Step)
How to Paint Kitchen Cabinets for a Professional Finish (Step-by-Step)
Painted kitchen cabinets can look stunning — or they can look like a bad DIY job with brush marks, chips and drips. The difference is entirely in the preparation. Here’s how to paint kitchen cabinets for a professional finish, the method the pros actually use.
What you’ll need
- Sugar soap or TSP substitute — degreasing is non-negotiable
- Sandpaper: 120-grit (keying) and 220-grit (between coats)
- Primer: shellac-based (Zinsser BIN) for glossy/varnished surfaces; standard adhesion primer for matt
- Paint: proper cabinet/furniture paint — Frenchic Al Fresco, Farrow & Ball Modern Eggshell, Dulux Cupboard Paint, or Little Greene Intelligent Eggshell
- Mini foam rollers (4-inch) + a good synthetic brush for edges
- Screwdriver, labelled bags for hinges/screws, dust sheets, masking tape
Do not use wall emulsion. It scuffs, marks and wipes off. Cabinet paint is formulated for hard wear — this is the single most important material choice.
Step 1: Remove everything
Take all doors and drawer fronts off, remove handles, hinges and knobs. Label everything (painter’s tape + marker: “top left”, “next to oven”…). You’ll thank yourself at reassembly. Number the hinges too — they wear into their positions.
Step 2: Deep clean (the step everyone skips)
Kitchens are coated in invisible grease. Wash every surface with sugar soap and hot water, twice. Then wipe with clean water. If you skip this, paint peels within months — guaranteed. Run your finger along the surface after cleaning; it should squeak, not slide.
Step 3: Sand
Sand all surfaces with 120-grit to key them (you’re not removing the old finish, just roughing it). Pay special attention to glossy areas. Wipe down with a tack cloth or damp microfibre to remove all dust. For varnished or laminate surfaces, this step is critical — paint needs something to grip.
Step 4: Prime
One coat of adhesion primer (Zinsser BIN shellac primer for tricky surfaces — it sticks to literally everything, though it smells strongly so ventilate well). Let it dry fully per the tin’s instructions. Lightly sand with 220-grit after priming for an ultra-smooth base — this is the pro secret.
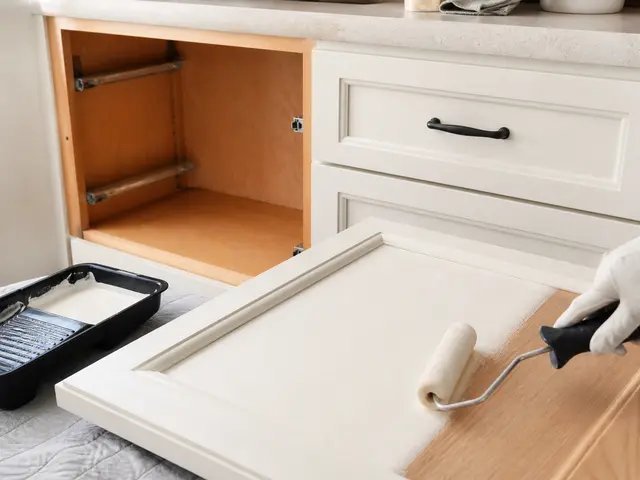
Step 5: Paint — thin coats, always
- Apply thin, even coats with the foam roller, laying off with the brush in one direction.
- Two to three coats minimum, with 220-grit sanding between each (this is what creates the glass-smooth finish).
- Paint doors flat on trestles or a table — never hanging. Gravity is your enemy on vertical surfaces.
- Do edges and details with the brush first, then roll the flat areas.
- Resist the urge to go back over drying paint — it drags and marks. If you miss a spot, catch it in the next coat.
Step 6: Cure before use
This is the hard part: cabinet paint takes 2–3 weeks to fully cure (harden), even though it’s touch-dry in hours. Rehang doors carefully after 48 hours, but treat them gently for the first couple of weeks — no slamming, no harsh cleaning. Mark the calendar. Rushing this step causes 90% of “my paint chipped” complaints.
Step 7: Reassemble and upgrade
Rehang doors, fit new handles (£2–£5 each — the jewellery of the kitchen), and step back. New handles on freshly painted cabinets is the combination that makes people ask “did you get a new kitchen?”
Common mistakes
- Skipping degreasing — paint peels in sheets within months
- Thick coats — drips, sags, and slow curing; thin wins
- Wrong paint — emulsion or standard eggshell won’t survive kitchen life
- Painting in a dusty/cold room — dust nibs in the finish; cold slows curing
- Using the kitchen normally during curing — plan for gentle use for 2 weeks
Spray vs brush/roller?
A paint sprayer (£80–£150 for a decent HVLP unit) gives the flattest finish — closest to factory. But it needs masking everything within 3 metres, outdoor or garage space, and practice. For most DIYers, foam roller + brush with proper sanding between coats gets 90% of the way there. Professionals charging £1,500–£3,000 for a kitchen spray job earn their money in the finish quality.
The bottom line
Degrease obsessively, sand everything, prime properly, apply thin coats with sanding between, and let it cure. That sequence — not expensive paint or fancy tools — is what separates professional-looking cabinets from disappointing ones. For the cost-benefit case, read whether painting cabinets is worth it vs replacing. Done right, £200 of materials buys you a kitchen that looks £5,000 newer.
Troubleshooting: fixing problems mid-project
Things go wrong — here’s how to recover. Drips and sags: let them dry fully, sand flat with 220-grit, recoat thinly. Don’t try to fix wet drips — you’ll make it worse. Brush marks: usually too-thick paint or overworking — sand back with 220-grit and recoat thinner, working faster. Bubbles: shaking the paint tin (don’t — stir gently), painting in direct sun/heat, or moisture — sand out and recoat in cooler conditions. Peeling: contamination (grease) or wrong primer — strip the peeling area, degrease again, spot-prime with shellac, recoat.
Paint not adhering to laminate: you skipped the shellac primer or the degreasing — there’s no fix except stripping back and starting that section properly. Colour looks wrong: live with it for 48 hours in different lights before deciding — paint dries darker/lighter than the wet colour, and morning vs evening light transforms it. If it’s truly wrong, one more topcoat in the right colour is only a day’s work — better than years of regret.
Cabinet painting FAQs
What’s the best paint brand for cabinets? Frenchic Al Fresco (self-priming, huge colour range, very forgiving), Farrow & Ball Modern Eggshell (beautiful colours, needs primer, premium price), Little Greene Intelligent Eggshell (durable, eco credentials), Dulux Cupboard Paint (widely available, solid performer). All work — technique matters more than brand.
Do I need to sand between every coat? Yes — a light 220-grit scuff between coats is what creates the smooth, professional feel. It takes 20 minutes for a kitchen’s worth of doors and makes more difference than any other single step. Skip it and the finish feels rough no matter how good the paint.
Can I paint over already-painted cabinets? Yes — degrease, sand to key (120-grit), prime if the old paint is glossy or unknown, then topcoat. If the old paint is peeling or flaking, strip the loose areas first — painting over failure just inherits it.
How do I clean painted cabinets? Soft cloth, warm water, mild detergent — no abrasives, no bleach, no steam cleaners (steam lifts paint). Wipe spills promptly, especially around the kettle and cooker. Touch up chips immediately with a small artist’s brush — 5 minutes now prevents a spreading chip later.
Is it worth hiring a professional sprayer? At £1,500–£3,000, professional spraying costs 5–10x DIY but delivers a factory finish that’s genuinely hard to distinguish from new units. Worth it if: the kitchen is high-value, you’re selling soon, or you want the best possible result without the DIY time. For most people, careful DIY with sanding between coats gets 90% there for £200.
Related reading
First, check whether painting beats replacing — plus Dulux’s cupboard painting guides for product advice.