
How to Lay Vinyl Flooring Yourself: A Beginner’s Guide
How to Lay Vinyl Flooring Yourself: A Beginner’s Guide
Vinyl flooring (LVT/luxury vinyl tile) is one of the most beginner-friendly DIY flooring projects — no glue, no nails, just click and go. Here’s how to lay vinyl flooring yourself as a beginner, with the mistakes to avoid.
What you’ll need
- Click-lock vinyl planks/tiles — the beginner-friendly format (avoid glue-down for your first go)
- Tape measure, pencil, spirit level
- Utility knife + straight edge (for cutting — score and snap)
- Spacers (£3), tapping block and pull bar (£10–£15 kit)
- Knee pads (£10 — trust me)
- Jigsaw or coping saw for awkward cuts around pipes/door frames
Step 1: Prepare the subfloor (the boring bit that matters most)
Vinyl shows every bump. The subfloor must be clean, dry and level:
- Remove old flooring, staples, and debris
- Fill dips and holes with levelling compound; sand down high spots
- On concrete: check moisture (tape a plastic sheet down for 24h — condensation underneath means damp issues to fix first)
- On floorboards: screw down loose boards; overlay with 6mm plywood if very uneven
- Vacuum thoroughly — grit under vinyl telegraphs through
Pros will tell you: 80% of a good vinyl floor is preparation. They’re right.
Step 2: Acclimatise the planks
Stack the unopened boxes flat in the room for 48 hours before laying. Vinyl expands and contracts with temperature — laying cold planks from the garage guarantees gaps later.
Step 3: Plan the layout
- Measure the room and calculate: you want the first and last rows to be more than half a plank wide. Adjust your starting point accordingly.
- Stagger joints by at least 15–20cm between rows (like brickwork) — never align joints row to row.
- Decide direction: usually along the longest wall or towards the main light source.
- Undercut door frames with a jamb saw (£15) or multi-tool so planks slide underneath — much neater than cutting around.
Step 4: Lay the floor
- Start in a corner with the tongue facing the wall, spacers in place (8–10mm expansion gap all round).
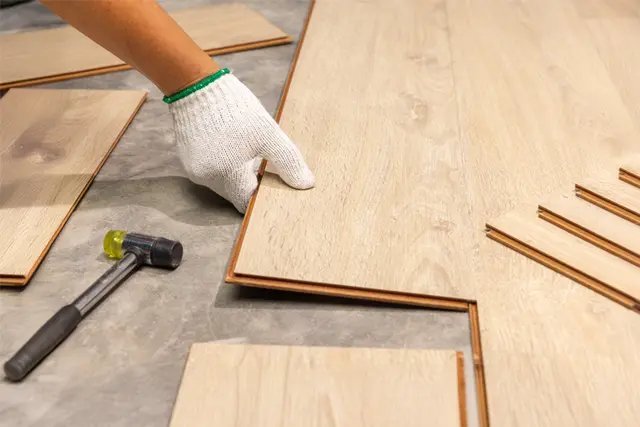
- Click planks together at an angle then lay flat — you’ll feel them lock.
- Use the tapping block (never hammer directly on planks) for snug joints.
- Cut end planks by scoring with the utility knife and snapping — measure twice, cut once.
- For pipes: drill a hole slightly larger than the pipe, cut a wedge to the plank edge, glue the wedge back after fitting.
- Final row: measure, rip-cut lengthwise, use the pull bar to click it in.
Step 5: Finish
- Remove spacers, fit scotia/beading or refit skirting over the expansion gap.
- Fit door threshold strips where vinyl meets other flooring.
- Wait 24 hours before moving heavy furniture back (48h for full cure on some products).
- Stick felt pads on all furniture feet — prevents dents and scratches.
Beginner mistakes to avoid
- Skipping subfloor prep — every bump shows; every dip flexes and eventually cracks the click joints
- No expansion gap — the floor buckles in summer heat
- Aligned joints — weak and ugly; stagger properly
- Laying cold planks — acclimatise 48 hours
- Dragging furniture across the new floor — lift, don’t drag
- Starting with a full plank without checking the final row width — ends with a 2cm sliver that’s impossible to fit neatly
How long does it take?
A beginner can lay 15–20 sqm in a day once going (plus prep time). A typical living room: one weekend including prep. It’s genuinely satisfying work — the transformation per hour is enormous.
The bottom line
Click-lock vinyl is the ideal first flooring project: forgiving to cut, no adhesives, and mistakes are fixable (un-click and redo). Invest your effort in subfloor preparation and layout planning — the actual clicking together is the easy part. For choosing between vinyl and laminate first, read our laminate vs vinyl comparison. Measure twice, acclimatise properly, and you’ll have a floor that looks professionally laid.
Tools worth buying vs hiring
For a one-room vinyl job, buy: a good utility knife + spare blades (£10 — change blades often; blunt blades tear vinyl), tapping block and pull bar kit (£10–£15), spacers (£3), tape measure and pencil, knee pads (£10 — non-negotiable for a day on the floor). Hire/borrow: a jigsaw for awkward cuts (£30–£40 to hire for a day, or borrow — you’ll use it for 20 minutes), a jamb saw for undercutting door frames (£15 to buy, worth owning).
Don’t buy: a vinyl cutter guillotine (£80+) for one room — the utility knife does the job. Do buy: a spirit level (2m, £15) for checking the subfloor — you’ll use it for every future DIY job. Total tool investment for a first-timer: £50–£70, most of it reusable forever.
Vinyl laying FAQs
How flat does the subfloor need to be? 3mm variation over 2m is the standard tolerance — check with a long straight edge. Vinyl shows every bump and dip: high spots telegraph through, low spots flex and crack the click joints over time. Self-levelling compound (£15–£25 a bag, covers ~5 sqm) fixes concrete; plywood overlay (6mm, £15–£20 a sheet) fixes boards.
Can I lay vinyl over underfloor heating? Yes — most click vinyl is UFH-compatible (check the spec: max 27°C surface temperature). Turn the heating off 48 hours before laying, keep it off for 48 hours after, then bring it up gradually (2–3°C per day). Thermal shock cracks click joints.
Which direction should planks run? Along the longest wall or towards the main window/light source — both make rooms feel larger. In hallways: along the length. There’s no structural reason; it’s purely visual. But be consistent through open-plan spaces — changing direction mid-room looks wrong.
How do I cut around door frames? Undercut the architrave with a jamb saw (£15) or multi-tool — slide the plank underneath for a professional finish. Cutting around frames leaves ugly gaps that need caulk. Undercutting takes 5 minutes per door and looks 10x better — it’s the detail that separates DIY from pro.
Can I walk on it immediately? Light foot traffic: yes, immediately. Heavy furniture: wait 24 hours. The click joints settle and lock fully over the first day — dragging a sofa across fresh joints can pop them. Lift, don’t drag, and use felt pads.
Related reading
Decide first with laminate vs vinyl compared — and Wickes’ vinyl installation guides for product-specific tips.