
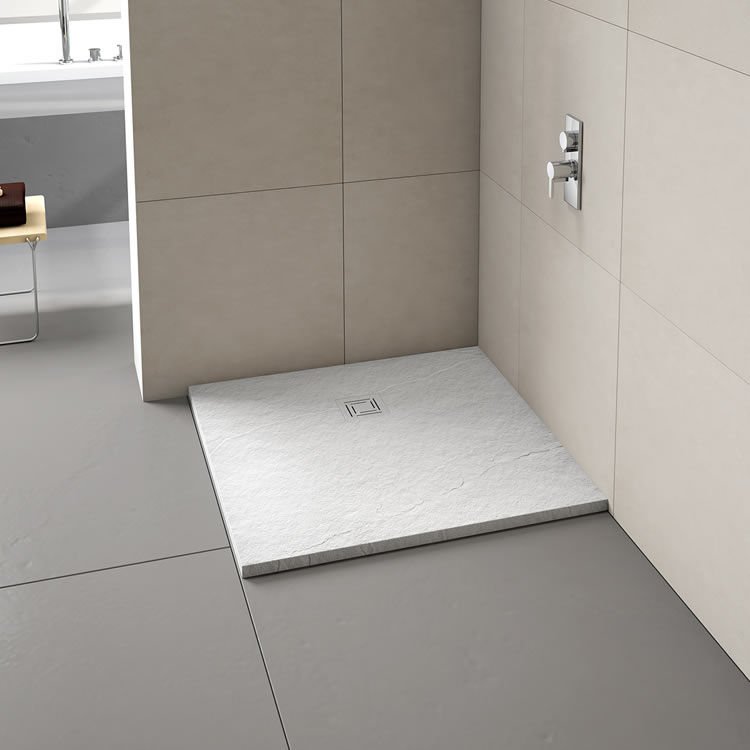
Acrylic Shower Pan: What You Need to Know
An acrylic shower pan (also called a shower tray in the UK) is a pre-made shower base made from acrylic — a lightweight, hard-wearing plastic. It sits on your bathroom floor and catches the water from your shower, channelling it into the drain. If you’re fitting a new shower or replacing a cracked tray, an acrylic shower pan is one of the most popular choices in British homes because it’s affordable, easy to install, and comfortable to stand on. In this guide, we’ll explain what acrylic shower pans are, how they compare to other materials, what to look for when buying one, and how to look after yours so it lasts for years.
What Exactly Is an Acrylic Shower Pan?
A shower pan is the waterproof base of your shower — the part you stand on. “Acrylic” simply describes the material it’s made from. Acrylic is a type of plastic sheet that is heated and moulded into the shape of a shower tray, then reinforced underneath (usually with fibreglass or a resin backing) to give it strength.
In the UK, you’ll hear the terms “shower pan” and “shower tray” used for the same thing. Most British bathroom shops — B&Q, Wickes, VictoriaPlum, and Plumbworld — list them as shower trays. They come in standard shapes: square (760mm x 760mm and 900mm x 900mm are the most common), rectangular (1200mm x 800mm, 1400mm x 900mm, and larger), quadrant (curved corner), and offset quadrant.
A good acrylic tray feels solid underfoot, has a slightly textured anti-slip surface, and comes with a raised lip around the edge that keeps water inside the showering area. Most trays are between 25mm and 45mm deep (low profile), though you can still buy raised trays that sit higher off the floor.
Pros and Cons of Acrylic Shower Pans
Like any bathroom product, acrylic trays have strengths and weaknesses. Here’s an honest look at both.
Advantages:
- Affordable. A decent acrylic tray costs £60 to £150 at most UK retailers, which is far cheaper than stone resin or solid surface trays.
- Lightweight. An acrylic tray is easy for one person to carry upstairs, which makes DIY installation much simpler.
- Warm underfoot. Unlike ceramic or stone, acrylic doesn’t feel freezing cold when you step in on a winter morning.
- Easy to clean. The smooth, non-porous surface wipes clean with a damp cloth and mild cleaner.
- Repairable. Small scratches can often be polished out with a fine abrasive pad and acrylic polish.
Disadvantages:
- Can flex. Cheaper, thinner trays may flex slightly underfoot, which can crack the sealant around the edges over time. Always buy a tray with proper reinforcement.
- Scratches more easily than stone. Acrylic is softer than stone resin, so gritty cleaners or dropped shampoo bottles can mark it.
- Can stain. Hair dye, fake tan, and some coloured bath products can stain acrylic if left sitting on it.
- Shorter lifespan than premium materials. A good acrylic tray lasts 10 to 15 years; a stone resin tray can last 20 or more.
Acrylic vs Stone Resin vs Ceramic: Which Is Best?
These are the three main materials you’ll see when shopping for a shower tray in the UK. Here’s how they compare.
Acrylic is the budget-friendly all-rounder. It’s light, warm, and easy to fit — ideal for most family bathrooms and rental properties. Expect to pay £60–£150.
Stone resin (sometimes called SMC or stone effect) is heavier and more rigid. It feels more premium underfoot and resists scratches better than acrylic. Prices start around £120 and go up to £300+. If you want a tray that feels rock solid and lasts decades, stone resin is worth the extra money. Many Which? bathroom reviews note that stone resin trays score well for durability.
Ceramic trays were common in older UK bathrooms but are less popular now. They’re heavy, cold underfoot, and can chip. They do last a long time if looked after, but most buyers today choose acrylic or stone resin.
For most people, the choice comes down to budget: acrylic if you want good value, stone resin if you want the most solid feel and longest life.
What to Look for When Buying an Acrylic Shower Pan
Not all acrylic trays are equal. Keep these points in mind when shopping:
1. Thickness and reinforcement. Look for trays described as “double skinned” or “reinforced” — these have extra backing that stops flexing. A tray that feels flimsy in the shop will feel worse once fitted.
2. Anti-slip rating. Check for an anti-slip surface. In the UK, look for trays tested to recognised slip-resistance standards — especially important if elderly family members use the shower.
3. Waste position. Make sure the waste (drain hole) position matches your plumbing — or be prepared to move the pipework. Trays come with centre, corner, or offset waste positions.
4. Upstands. Some trays have built-in upstands (raised edges) that tuck behind the wall tiles for a watertight seal. These are excellent for preventing leaks.
5. Guarantee. A 10-year guarantee is standard on decent acrylic trays from brands like Mira, Triton, and MX. Avoid trays with no guarantee at all.
6. Compatibility. If you’re buying a shower enclosure too, check the tray and enclosure are the same size and from compatible ranges — many brands sell them as matching sets.
How to Install an Acrylic Shower Pan: The Basics
Fitting a shower tray is a manageable DIY job if you’re reasonably handy, though many people prefer to hire a plumber (expect to pay £150–£300 for fitting in most UK regions). Here’s an overview of the process:
- Prepare the floor. The floor must be level and solid. Acrylic trays need full support underneath — either bedded on mortar or sitting on a purpose-made riser kit.
- Position the tray. Dry-fit the tray first, checking it’s level in all directions with a spirit level. Mark the waste position.
- Connect the waste. Fit the shower waste (trap) to the tray, connecting it to your soil pipe or waste pipe. Test for leaks before going further.
- Bed the tray. Most installers bed acrylic trays on a weak sand-and-cement mix or tile adhesive to give full, even support and prevent flexing. Never leave voids underneath.
- Seal the edges. Once the tray is set and level, run a bead of quality silicone sealant (such as Dow Corning 785, made for bathrooms) around all wall joints. Let it cure for 24 hours before using the shower.
The single biggest cause of acrylic tray failure is poor support underneath. A tray that flexes will eventually crack its sealant, letting water seep behind it. Take your time with the bedding step — it’s the most important part of the job.
How to Clean and Maintain Your Acrylic Shower Tray
Acrylic is easy to keep looking good with the right routine:
- Daily: A quick rinse and squeegee after showering stops limescale and soap scum building up — a big help in hard-water areas like London and the South East.
- Weekly: Clean with a soft cloth or sponge and a mild bathroom cleaner. Avoid bleach-based cleaners and anything abrasive.
- Limescale: In hard-water areas, use a dedicated limescale remover (Viakal is widely available in UK supermarkets) rather than scrubbing.
- Stains: For fake tan or hair dye marks, try a paste of bicarbonate of soda and water, left for 15 minutes then rinsed. Don’t use acetone or nail polish remover — they can damage acrylic.
- Sealant: Check the silicone around the tray once a year. If it’s peeling or blackened, cut it out and re-seal before water gets behind the tray.
Frequently Asked Questions
How long does an acrylic shower pan last?
A quality acrylic shower tray typically lasts 10 to 15 years with normal use and proper installation. The most common reason for early replacement is sealant failure from a tray that flexes — which is why correct bedding during installation matters so much.
Can you repair a cracked acrylic shower tray?
Small surface scratches can be polished out, but a cracked tray generally needs replacing. Repair kits exist, but a crack in the tray body usually means water can get through, so replacement is the safer option. If your tray is still under guarantee, contact the manufacturer first.
Are acrylic shower trays slippery?
Basic acrylic can be slippery when wet, which is why most modern trays have a textured anti-slip surface. If your tray feels slippery, you can add anti-slip stickers or a shower mat. Always check the slip-resistance rating when buying.
Can I fit an acrylic shower tray myself?
Yes, if you’re comfortable with basic plumbing and levelling. The key steps are getting the tray perfectly level, fully supported underneath, and properly sealed. If you’re unsure about the waste plumbing, hiring a plumber for a half-day job is money well spent.
What’s the standard shower tray size in the UK?
The most common UK sizes are 760 x 760mm (small square), 900 x 900mm (large square), and 1200 x 800mm (rectangular). Quadrant trays for corner installations are typically 900 x 900mm or 800 x 800mm. Always measure your space before buying.
Final Thoughts
An acrylic shower pan is a practical, affordable choice for most UK bathrooms. It won’t last as long as a premium stone resin tray, and it needs proper support during installation to avoid flexing — but for the price, it’s hard to beat. Buy a reinforced tray from a reputable brand, bed it properly, seal it well, and clean it gently, and you’ll get a decade or more of reliable service. Whether you’re doing a full bathroom renovation or just replacing a tired old tray, acrylic remains the sensible default for good reason.