
How to Reseal Windows: Step-by-Step Guide (2026)
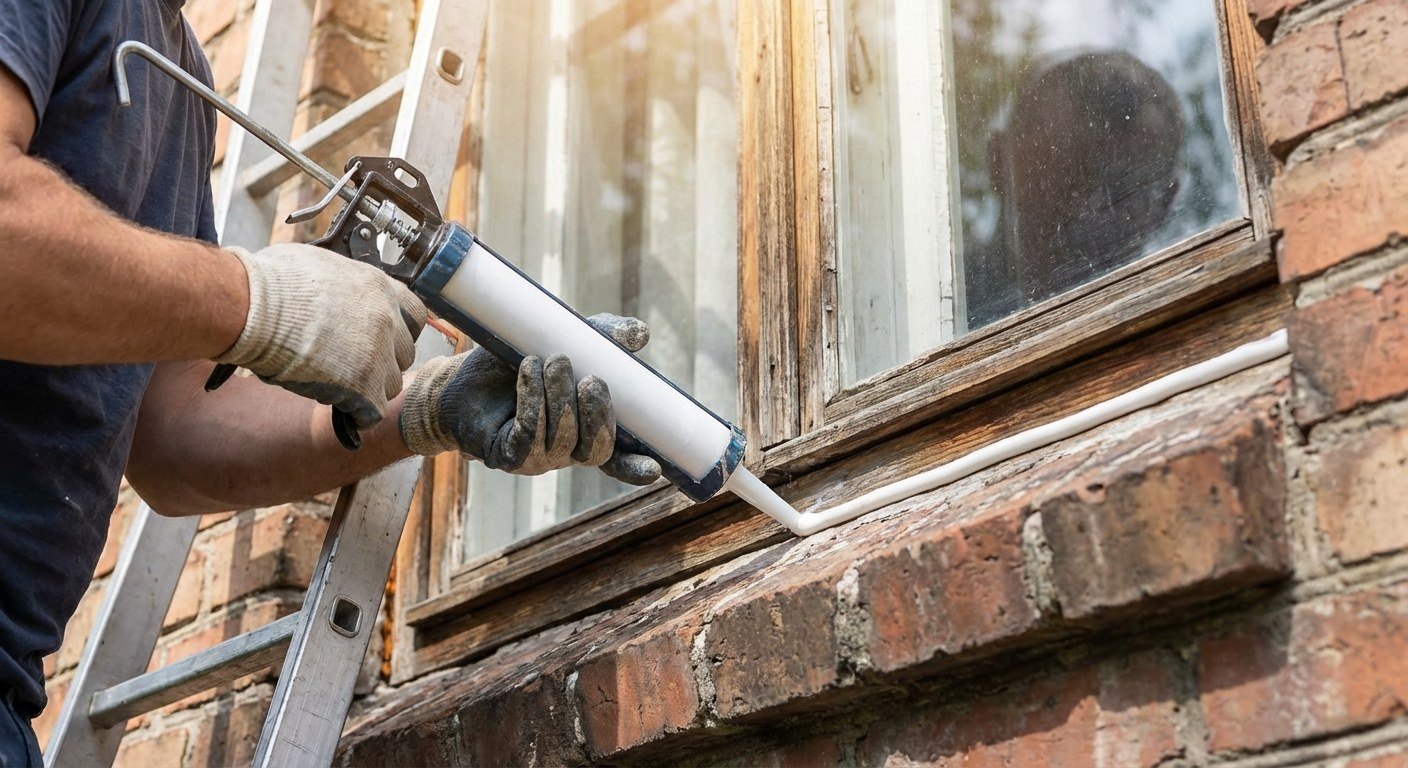
Wondering how to reseal windows? The quick answer: cut away the old, cracked sealant, clean the gap properly, then run a fresh bead of silicone sealant around the frame with a sealant gun and smooth it off. It takes about an hour per window, costs under £20, and stops draughts and leaks straight away. It is one of the cheapest DIY jobs you can do on a British home, and it makes a real difference when the autumn rain starts rattling against the glass.
Window seals do not last forever. Years of British weather — frost in January, heatwaves in July, and months of sideways rain in between — wear sealant down until it cracks, peels and pulls away from the frame. Once that happens, cold air gets in, warm air gets out, and water can start creeping where it should not. The good news is that resealing windows is a job most people can handle with a few basic tools, whether your frames are uPVC or timber.
In this guide, we will walk you through the whole process step by step: how to spot failed seals, which sealant to buy, how to do a neat job on both uPVC and wooden frames, and when to stop and call a professional instead.
Signs Your Windows Need Resealing
Before you buy anything, check whether your seals are actually the problem. Here are the tell-tale signs:
- Draughts: You can feel cold air coming in around the edges of the frame, even when the window is shut. Hold a lit candle or a strip of tissue near the frame on a windy day — if it flickers, air is getting through.
- Cracked or crumbly sealant: The bead of sealant around the outside of the frame is split, shrunk or peeling away.
- Water marks or damp patches: Staining on the wall or windowsill below the window after heavy rain often means water is getting past the seal.
- Rattling glass: Loose panes that rattle in the wind have lost their seal.
- Condensation between the panes: This one is important. Mist trapped inside a double-glazed unit means the sealed unit itself has failed — no amount of external sealant will fix that, and you will need a replacement glass unit fitted by a pro.
- Mould around the frame: Persistent damp from failed seals feeds mould growth on sills and reveals.
If the problem is just the sealant around the frame — the stuff you can see and touch — carry on reading. If the glass itself is misted, jump to the section on when to call a professional.
What You’ll Need to Reseal Windows
Everything on this list is available at B&Q, Screwfix, Toolstation or your local independent DIY shop. For one or two windows, expect to spend around £15–£20 in total.
- Silicone sealant — one 300ml tube does roughly one average window. Around £6–£10 per tube. See the section below on which type to buy.
- Sealant gun — about £5 for a basic one. Worth buying even if you only do this once; it gives a far smoother bead than squeezing the tube by hand.
- Sealant remover tool or sharp utility knife — for cutting out the old sealant. A dedicated silicone remover tool (about £5) is safer on uPVC than a bare blade.
- Silicone sealant remover gel (optional but handy) — about £7. It softens stubborn old sealant so it peels out more easily.
- Masking tape — for crisp, straight edges.
- Cleaning cloths and methylated spirit or white spirit — the surface must be spotless before the new sealant goes on.
- Bucket of warm water with a squirt of washing-up liquid — for smoothing the bead.
- Safety gloves and glasses — blades and chemicals, so do not skip these.
- Stable ladder or step platform — if any window is above ground floor. Never lean out of an upstairs window to reach the outside seal; get proper access.
How to Reseal Windows on uPVC Frames: Step-by-Step
uPVC windows are the most common type in the UK, and resealing them is straightforward because the frame surface is smooth and the old sealant usually peels out in satisfying strips. This method also works for aluminium frames.
- Pick a dry, mild day. Silicone needs dry surfaces to stick, and most types should not be applied below 5°C or in rain. Check the forecast and give yourself a dry window of a few hours.
- Open the window and inspect. Look at both the inside and outside seals. You are resealing the fixed joints — where the frame meets the wall and where the glass meets the frame — not the opening parts of the window.
- Cut out the old sealant. Run your remover tool or utility knife along both edges of the old bead to break it free, then pull it away in strips. On uPVC, be gentle with the blade — gouging the plastic looks awful and is hard to fix. Work in sections of about 30cm.
- Soften any stubborn bits. If old silicone is clinging on, apply silicone remover gel, wait the time stated on the tube (usually 2–3 hours), then scrape it off. Do not just seal over the old stuff — new silicone will not bond properly to old silicone.
- Clean the gap thoroughly. Wipe the joint with a cloth dampened with methylated spirit to remove dust, grease and old sealant residue. The Energy Saving Trust recommends silicone sealant for windows that do not open, and it only performs well on a clean, dry surface. Let it dry completely.
- Mask both sides of the joint. Lay strips of masking tape about 3–4mm either side of the gap. This is the secret to a professional-looking finish and takes two minutes.
- Load the sealant gun and cut the nozzle. Cut the nozzle at a 45-degree angle so the opening is just slightly narrower than the gap you are filling. A smaller hole is always better — you can cut more off, but you cannot put it back.
- Apply one smooth, continuous bead. Hold the gun at 45 degrees and push (do not pull) the sealant along the joint in one steady movement, keeping even pressure on the trigger. Start at the top of the window and work down the sides, finishing along the bottom.
- Smooth it off immediately. Dip your finger in the washing-up liquid solution and run it along the bead in one pass with light pressure. Do this before the silicone starts to skin over — usually within 5–10 minutes.
- Peel off the masking tape. Pull the tape away at a sharp angle while the silicone is still wet. If you wait until it has set, the tape will tear the bead.
- Leave it to cure. Most silicones skin over in 30 minutes and fully cure in 24–48 hours. Do not test it with water or close trickle vents against it until then.
How to Reseal Windows on Timber Frames
Timber windows — Victorian sashes, cottage casements, and older wooden frames — need a slightly different approach because the surface is porous and the sealant has to flex as the wood swells and shrinks through the seasons.
- Check the wood first. Sealant cannot save rotten timber. Press the frame with a screwdriver — if it sinks in or the wood is soft and crumbly, the section needs repairing or replacing before you seal anything. Cut out rot, fill with a two-part wood filler, and let it harden.
- Strip back loose paint. Scrape off any flaking paint around the joint, then sand the area with 120-grit sandpaper so the sealant has a sound surface to grip.
- Remove the old sealant or putty. Old linseed putty on timber windows can be rock hard. A heat gun on a low setting softens it, but keep the gun moving and well away from the glass — thermal shock can crack panes. A putty chisel works well too.
- Prime bare wood. Brush a coat of primer or preservative onto any bare timber and let it dry. Sealing straight onto raw wood gives a poor bond and the wood will keep drawing moisture.
- Choose a flexible sealant. Standard silicone works on timber, but a flexible frame sealant or a high-quality hybrid polymer sealant copes better with the movement of wooden frames. Avoid hard-setting products that will crack the first time the wood swells in winter.
- Mask, apply and smooth as for uPVC. Follow steps 6–10 above. On timber, keep the bead fairly slim — you are filling the gap, not burying the frame.
- Repaint over paintable sealant if needed. If you want the seal to disappear under paint, make sure you bought a paintable sealant (most standard silicones are not paintable — paint slides straight off them). Otherwise, choose a silicone in a colour that matches your frame.
Silicone or Sealant? Choosing the Right Product
The DIY shelf can be confusing, so here is a simple breakdown:
- Neutral-cure silicone: The best all-rounder for resealing windows. It sticks to uPVC, glass, timber and masonry, stays flexible for years, and does not corrode metal. Look for “low modulus” on the tube — it means the silicone stretches easily, which is what you want around a moving frame. Expect to pay £7–£10 at Screwfix or B&Q.
- Acetoxy-cure silicone: Cheaper (around £4–£6), but it smells of vinegar while curing and can corrode some metals and stain natural stone. Fine for a basic uPVC-to-glass job, but neutral-cure is worth the extra couple of pounds.
- Hybrid polymer sealants: Excellent adhesion and fully paintable, which makes them popular for timber frames. Pricier at £10–£14 a tube.
- Frame sealant: Often sold specifically for window frames. Usually a flexible acrylic-silicone blend that is paintable — a good choice for timber.
- Decorator’s caulk: Do not use this outside. It is for interior cracks only and will wash out in the first proper downpour.
Whatever you buy, check the tube says it is suitable for exterior use and UV resistant — British sun (when it appears) breaks down cheap sealant fast.
When to Call a Professional
DIY resealing covers the sealant you can see and reach. Some jobs genuinely need a professional:
- Misted double glazing: Condensation between the panes means the sealed unit has failed. The glass unit needs replacing — a reseal of the frame will not fix it.
- Seals on the opening mechanism: Worn rubber gaskets around opening sashes can sometimes be replaced DIY, but if the window will not close squarely, the hinges or locking mechanism may need adjusting or replacing.
- Structural gaps: If the frame has pulled away from the wall leaving gaps wider than about 10mm, expanding foam plus sealant may be needed, and it is worth getting a proper survey.
- Listed buildings or conservation areas: Timber sash windows in older properties may have planning restrictions on what you can do. Check with your local council first.
- Full window replacement: If frames are warped, rotten through, or single-glazed and costing you a fortune in heating, replacement may be better value than endless repairs.
If you do need replacement windows or major glazing work, use a FENSA-approved installer. FENSA is the government-authorised scheme for replacement windows and doors in England and Wales — the installer self-certifies that the work meets Building Regulations, and you get a certificate that proves it, which matters when you sell your home. Which? also has a detailed guide to draught-proofing windows that is worth a read before you decide between DIY and calling someone in.
Top Tips
- Do it in autumn. Resealing in September or October means your windows are ready before the worst of the winter weather — and sealant cures better in mild temperatures than in a January freeze.
- One window at a time. Remove and replace the sealant on a single window before moving on. If rain arrives unexpectedly, you only have one open joint to worry about.
- Keep a damp cloth handy. Silicone on your hands, the glass or your clothes is easy to wipe off while wet and miserable to remove once cured.
- Check your trickle vents. Modern windows have small trickle vents for ventilation — never seal these shut. Homes need background ventilation to control condensation and keep the air healthy.
- Inspect every couple of years. Walk round your windows each autumn and look for cracks in the sealant. Catching it early means a quick touch-up instead of a full strip-and-reseal.
- Do the candle test after. Once the sealant has cured, repeat the draught test. If you still feel air coming in, the problem may be the window’s gaskets or hinges rather than the sealant.
- Buy one spare tube. Running out halfway round the house is frustrating, and an opened tube only keeps for a few weeks anyway.
Common Mistakes to Avoid
- Sealing over old sealant: New silicone does not bond to old silicone. Strip it all out first.
- Skipping the clean: Dust, grease and damp are the main reasons new seals fail early. A quick wipe with methylated spirit takes a minute.
- Cutting the nozzle too big: A fat bead looks messy and wastes sealant. Start small.
- Working in the rain or frost: Wet or freezing surfaces stop silicone bonding. Wait for a dry day above 5°C.
- Sealing trickle vents shut: This traps moisture indoors and can cause condensation and mould. Always leave vents open.
- Using interior caulk outside: It will fail within months. Check the tube says “exterior”.
Frequently Asked Questions
How long does window sealant take to dry?
Most silicone sealants form a skin in about 30 minutes and are shower-proof within a few hours, but full curing takes 24–48 hours. Avoid getting the fresh seal wet or pressing on it during that time.
Can I reseal windows in winter?
You can, but it is trickier. The surface must be dry and above 5°C, which rules out frosty or rainy days. If you must do it in winter, pick the mildest, driest afternoon you can and work quickly. Autumn is far easier.
How much does it cost to reseal windows?
DIY costs about £15–£20 per window for sealant and basic tools (less if you already own a sealant gun). A professional typically charges £50–£100 per window for a reseal, or £150–£300+ to replace a failed double-glazed unit.
My double glazing is misted up inside — will resealing fix it?
No. Mist between the panes means the sealed glass unit itself has failed, and no amount of external sealant will fix it. You need the glass unit replaced, which is a job for a glazing professional.
Should I use silicone or caulk around window frames?
Use silicone (or a dedicated exterior frame sealant) for the outside of window frames — it stays flexible and waterproof for years. Standard decorator’s caulk is for indoor use only and will break down quickly outdoors.
Resealing windows is one of those small jobs that pays for itself many times over — warmer rooms, lower heating bills, and no more damp patches creeping down the wall after a storm. Set aside a dry weekend afternoon, work one window at a time, and take your time with the masking tape. Your future self, sitting draught-free in January, will thank you.